Thursday, January 30, 2014

Sesame Chicken

It's becoming painfully clear to me that I have a pretty boring life when L's not here. ;) Well, I should take that back. My mama was here this past weekend from Friday to Tuesday, so that was pretty friggin' spectacular! We had a really great time, and that was her first time visiting since I moved here, so it was long overdue! Sadly, I didn't take many pictures since we kept the weekend very lowkey. Perhaps I need to work on doing some more exciting things, possibly make some new envelopes, go to a new store, anything, so I have something besides food to share with you. Otherwise, the next time you see me, I'm gonna be 300 pounds, ha! That being said, this recipe is worth sharing. Mama was surfing Pinterest over the weekend and found a super simple recipe for sesame chicken (original here), so we gave it a whirl. It hardly took any work at all, and it was pretty yummy! Not to mention, eating it the next day was just as delightful! Next time I'll probably make a bigger batch just because it didn't last that long, but either way, I will definitely put it in the rotation since my pantry contains many of these ingredients due to dating L. It's amazing how much my palette has grown since knowing him. :) Anyway, here goes another recipe, and I promise to switch it up soon and share something fun with you soon!
 The ingredients!
 Dice up your chicken!
 Mix the salt, pepper, and flour.
 Toss your chicken with the flour mixture.
 Mince (or grate) your garlic. Yes, I'm obsessed with this adorable grater!
 Put a little oil in the pan and throw in your chicken to brown it.
 Whisk the chicken stock, brown sugar, sesame oil, garlic, soy sauce, and white vinegar together.
 If you're awesome like me, then you also have a tiny whisk in addition to your tiny grater to use!:)
Cook the chicken. See it getting that nice color? Yum!
 Pour chicken stock mixture into the pan.
 Then toss the whole pan into your pre-heated oven. (Be sure it's an oven-safe pan!!)
 Bring it out of the oven and sprinkle it with sesame seeds. Looks amazing!
 Serve it with some rice and you've got yourself a meal!

INGREDIENTS
  • 1.5 pounds boneless, skinless chicken breasts, cut into pieces
  • 1/4 tsp. salt
  • 1/4 tsp. pepper
  • 1 Tbsp. flour (The recipe calls for whole wheat, but I used regular.)
  • 1 Tbsp. toasted sesame oil (The recipe calls for toasted, but I just had regular.)
  • 1/2 Tbsp. olive oil
  • 2 garlic cloves, minced
  • 1 Tbsp. low-sodium (or regular) soy sauce
  • 1 Tbsp. brown sugar
  • 1 Tbsp. white vinegar
  • 1/2 cup low-sodium (or regular) chicken stock (I used broth.)
  • 1 Tbsp. sesame seeds
  • 1 Tbsp. black sesame seeds (I don't even know what these are, so they were skipped!)
As you could maybe guess, this is intended to be a healthier version based on the original recipe. Feel free to do do it either way, but I thought it was excellent the way we made it!

DIRECTIONS
  • Preheat the oven to 400 degrees.
  • In a small bowl, whisk the chicken stock, brown sugar, sesame oil, garlic, soy sauce, and white vinegar together. Set aside.
  • In another bowl, mix the salt, pepper, and flour. Toss the chicken with it.
  • In a large pan (make sure it’s oven safe), heat the olive oil over medium heat. Once hot, add the chicken in one layer. Cook for three minutes on one side until seared and then flip and cook for another three minutes on the other side.
  • Turn off the heat and pour the chicken stock mixture over the chicken, stirring to combine.
  • Place the entire pan in the oven and cook for 20 minutes. 
  • Remove the chicken from the oven and toss it with sesame seeds. Serve.

Sunday, January 26, 2014

Jalepeno Popper Chicken Chili

Happy snowy Sunday, everyone! Hope you are all surviving this never ending winter. If you're struggling, maybe I can help with that... If you're like me and love warm, delicious soup on bitterly cold days, then I think you should try this recipe for Jalepeno Popper Chicken Chili! Don't be thrown off by the fact that it sounds pretty spicy. I actually thought it could use quite a bit more heat. Granted, I have a pretty high tolerance for spicy stuff, but everyone that ate it (me, my mom, my aunt, and my cousins) thought it was pretty mild. Just throwing that out there in case hot stuff scares you! I found the recipe for this chili on Pinterest a couple weeks ago (original recipe here), and it's another one of those that I just couldn't stop thinking about. My mom came down to visit this weekend, and I asked if she thought it sounded good. She sure did, and because we were both pretty pumped about it, we gave it a go yesterday. One word: YUM. I don't necessarily know what I expected, but it was even better than I thought! I am still semi-picky, so I left out a couple of the ingredients it called for (though I still included those ingredients in the list below), but I don't think that made much of a difference. I took lots of pictures, so bear with me! I really hope you give this a try. My only regret is that we didn't make it a double batch right off the bat! ;)
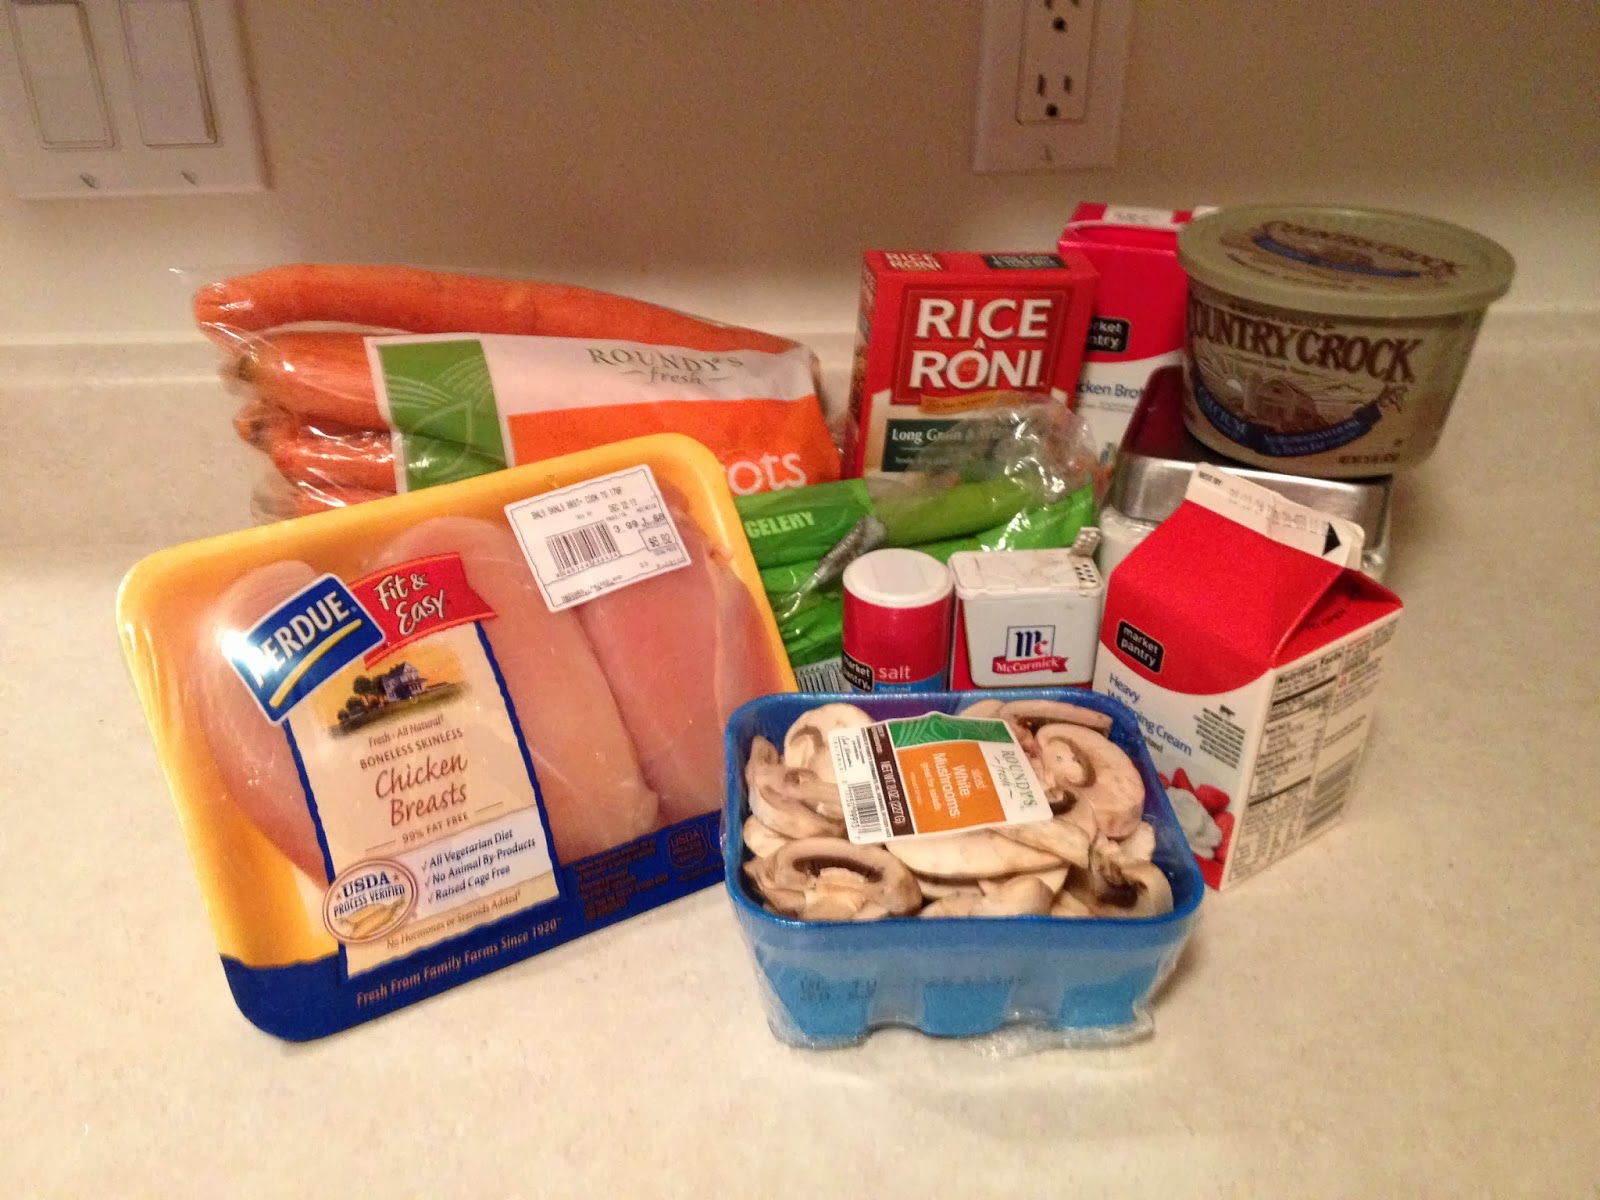
 The ingredients!
 Dice up your red pepper.
 And your onion. (Recipe calls for regular, but I had some green I needed to use up. Worked perfectly!)
 Get ready to slice and dice (well, mince) those jalepenos!
 
 
 Peel some garlic and mince (or in our case, grate) it!
 Seriously, how damn cute is that little mini grater?!
 
 Get all your veggies together and get them ready to throw in the pot.
 Dice up your chicken into bite-sized pieces and season it with salt and pepper.
 Now it's time to make the magic happen! Heat up your oil in a large pot.
 When the oil's nice and hot, throw your veggies in the pan. Looks like Christmas, and I love it!:)
 Saute them up real good for about 5-7 minutes. Your sense of smell will love you at this point!
 Move your veggies to the side and throw in the chicken to start browning it.
In the meantime, measure out your spices. Mmm!
 Once the chicken is no longer pink, throw your spices right in the pot and stir it up!
 Then add your diced tomatoes.
 And your chicken broth. Let it simmer for about 30 minutes.
 In the meantime, slice up some bacon and fry it up. (This is to top the chili, so it's optional, but well worth it!)
 
 Drain the bacon and set it aside.
 Feel free to fix yourself a bloody mary and enjoy that while you wait. ;)
 Man, look how beautiful that is after it's been simmering awhile!
 Cube up your cream cheese into large chunks.
 Throw those large chunks into the pot!
 And add in some cheese.
 As it all melts, your chili will transform into this beautiful orange color!
Wish I would've gotten a better picture of the final serving, but trust me when I say it's amazing!

INGREDIENTS (Don't be intimidated by the long list. It's super easy to make.)
  • 1 Tbsp. olive oil
  • 1 small onion, diced (As I mentioned, I used green onions since I had 'em!)
  • 1 red bell pepper, diced
  • 4 jalepeno peppers, seeds and ribs removed, minced
  • 4 cloves garlic, minced
  • 1/2 tsp. sea salt
  • 1 tsp. ground black pepper
  • 1 lb. boneless, skinless chicken breast, cut into bite-sized pieces
  • 2 tsp. chili powder
  • 1 Tbsp. ground cumin
  • 1 tsp. ground paprika
  • 1 (15 oz.) can no salt added diced tomatoes, undrained
  • 1 and 1/2 cups chicken broth (I used 2 cups to make up for lost liquid from ingredients I didn't use.)
  • 1 (15 oz.) can cannellini beans, drained and rinsed (I hate beans. I didn't use them.)
  • 2 cups frozen corn (I hate corn. I didn't use it.)
  • 8 oz. 1/3 less fat cream cheese, cut into large chunks (I used regular cream cheese since I had it!)
  • 1/4 cup (1 oz.) part-skim sharp cheddar cheese, shredded (I used cheddar jack since I had it!)
  • 3-4 slices bacon, cooked and crumbled

DIRECTIONS
  • In a large pot, heat the olive oil over medium-high heat. Once hot, add the onion, red pepper, jalapeno pepper, and garlic and saute for 5-7 minutes or until tender and onion is translucent.
  • Sprinkle the chicken with the salt and pepper. Push the vegetables to the side of the pan and add in the chicken. Cook the chicken until no longer pink. 
  • Stir in the chili powder, cumin, and paprika and allow to cook for 30 seconds or until fragrant.
  • Stir in the tomatoes, chicken broth, cannellini beans (if used), and corn (if used). Bring to a simmer and cook for 30 minutes.
  • Add in the cream cheese and cheese and stir until completely melted, about 5 minutes. Serve chili hot, topped with a teaspoon of bacon crumbles.
Easy peasy! We actually let ours simmer for quite awhile before we added in the cream cheese and cheese, so you can make it ahead of time, or make it right when you want to eat it. It was so good! We had 5 people eat it, one going back for seconds, and that left us with about one big bowl left. This technically makes 8 servings (1 and 1/4 cups each), but I think we each had a little more than that. ;) I think I would definitely make a double batch next time now that I know I love it! Go out and make it and tell me what you think!

Sunday, January 19, 2014

Soft White Christmas Cookies

Hi there! Forgive me for two recipe posts in a row, but I've been wanting to share a few with you, and I finally have the chance to do a little catch up on the blog! Trust me, you won't be mad once you try these cookies. :) Also, in case you're interested, I recently updated my "Cookin' in the Kitchen" tab in my blog so that when you click on it, you're taken to the links of all the recipes I've posted. Much easier than digging through old posts! Anyway, I don't know if you are all lucky enough to have a recipe that's been a part of your family for as long as you can remember, but I am, and the recipe is for these delicious, soft, amazingly tasty cookies. They are from this old, rickety cookbook that I think my mom got through the church many, many years ago, and I have always loved them more than should be humanly possible. They're dubbed as Christmas cookies, but they really could be made any time of year, somewhat similar to cut-out sugar cookies. Not gonna lie, while I put my life at risk by doing it every damn time, I cannot resist eating little scraps of the dough as I make the cut-outs. But folks, it's a risk I'm willing to take for how good it is. I'm semi-kidding, but I do love it, and in case you were worried, I didn't do it much this time since L was watching and didn't want me to get sick. That's probably a good thing, I guess. ;) Feels kinda weird posting these after the holidays since mine were very festively decorated, but again, you can make them whenever your heart desires!

 The ingredients!
 Mix all the ingredients together and you'll get this lovely dough! Chill it, and you can roll it out!
 Flour the counter (very well, the dough is sticky) and roll it out! This is only a small ball of dough. I probably did this process about 8-10 times for LOTS of cookies! (L also decided it was a good idea to make a couple cookies in the shape of certain body parts, but I chose to leave them out for your benefit;).
 Bake for 11-15 minutes at 325. Don't overdo it or they'll get hard!
 Get ready to frost these these bad boys!
 
Voila!

INGREDIENTS
  • 2 cups white sugar
  • 1 cup sour cream
  • 1/2 cup shortening
  • 1/2 cup butter
  • 2 tsp. vanilla
  • 3 eggs
  • 1/2 tsp. salt
  • 1 tsp. baking powder
  • 2 tsp. baking soda
  • 5 and 1/2 cups all-purpose flour

DIRECTIONS
  • Mix all the ingredients in the order they are listed in a big bowl. (I used an electric mixer, but it got pretty clogged since the dough is quite sticky. Not sure what the best option is, but the mixer did essentially do the job. Just gotta clean of the beaters!)
  • Chill the dough. (I chilled it for a couple hours, but it probably doesn't need that long.)
  • Preheat oven to 325 degrees.
  • Roll out dough on a well-floured surface. Can't emphasize this enough. As mentioned, the dough is very sticky, so much so that I had to call my mom and ask if that was normal. :) Turns out it is, and you just need to flour the counter and your hands, and if it sticks to the rolling pin, just add more flour. You get used it it, I promise!
  • Cut dough into desired shapes and place them on a cookie sheet.
  • Bake cookies for 11-15 minutes. (I cooked them on the lower end. I prefer my cookies to be soft, so I left them in for about 10-11 minutes and they were perfect.)
  • Let the cookies cool.
  • Frost and decorate the cookies. Have fun!

Just a note... The recipe didn't share how many cookies this yields, but I had quite a few. Probably 50-60 cookies or so, so you probably want to have a gathering or be very hungry for cookies for a week or two after you make them! ;) I actually still have some, and they're surprisingly still good! I really hope you enjoy these as much as I do. Maybe they can become part of your tradition!

Crock-Pot Creamy Chicken and Wild Rice Soup

This winter has been an especially brutal one compared to the past few years. Seems like it's always either snowing like crazy or freezing to the point where you can throw boiling water into the air and it turns into steam. Google that shit, I'm not making it up! (Sadly, I didn't get to try that trick since I was miserable with a cold during our -50 degree wind chills, but I'll probably get the chance again if I'm "lucky.") Anyway, I don't know about the rest of you, but I firmly believe that winter is the perfect time for comfort food. Well, comfort food is always welcomed, but on a cold, snowy day, there are few things better than a nice, hot bowl of delicious soup. Any kind of soup. Lucky for you, I'm going to share one of my favorite soup recipes. Of course, I found it on Pinterest! As the title implies, it is a crock-pot recipe, so it is actually pretty dang easy! I blame that for my lack of a large number of photos. It basically just sits in the crock-pot, and since the roux is still tricky for me, I didn't want to try and take photos of that. When I make this again, I'll try to get more photos, I promise! Anyway, L just got me a new, bigger crock-pot for Christmas (a 6-quart one, at my request, so no, not some weird gift from a clueless dude;), so I made it for us a couple weeks back. It was even more delicious than I remember. I strongly encourage you to drop everything and make this recipe, especially because it allows for as few or as many modifications as you see fit. Don't like carrots? Don't put 'em in! Recipe doesn't call for them but you love mushrooms? Throw some in the crock-pot! Perfect. I got the original recipe here, and as always, I'll share my own comments and observations throughout. I guarantee you will love me for sharing, even if it's just for how your house smells while it cooks. Enjoy!

 The ingredients!
 Shred up some carrots.
 And dice up some celery.
 Then throw almost all your ingredients (broth, water, chicken, carrots, celery, mushrooms, and rice) into the crock-pot so it can do its magic!
 At the end of the cooking time, make your roux and add it to the crock-pot. Doesn't it look amazing?! Eat. NOW.

INGREDIENTS
  • 4 cups (32 oz.) chicken broth
  • 2 cups water
  • 2 boneless, skinless chicken breasts (I used a 3-pack:).
  • 1 package Rice-a-Roni long grain and wild rice 
  • 1/2 tsp. salt (plus more to taste)
  • 1/2 tsp. pepper
  • 3/4 cup all-purpose flour
  • 1/2 cup butter
  • 2 cups half and half
  • 1 cup grated carrots
  • 1 cup diced celery
  • 1 container of mushrooms (I added this myself. You could use canned mushrooms too. Or you could leave them out entirely if you don't like them since the recipe didn't even call for that.
(Admittedly, based on this recipe, there actually isn't that much rice in this wild rice soup, so while I didn't add more, you could think about it if you prefer more rice. Kinda funny given the name, right?)


DIRECTIONS
  • Mix the broth, water, carrots, celery, mushrooms, chicken, and rice (and the seasoning packet) in the slow cooker. Cook on low for 6-8 hours or on high for 4 hours. (I did the high version and it turned out great. Also, the first time I made it, I used a 3-quart crock-pot and it was too small. My 6-quart pot worked beautifully for it!)
  • Once the chicken gets tender (a couple hours in), break it up into pieces while cooking. (I had to leave mine in longer than this for it to break apart easily. Possibly since I used more chicken than it called for, but just use your judgment and feel free to keep the chicken in there longer before breaking it up if necessary.)
  • At the end of the cooking time, get a small bowl and mix the salt, pepper and flour. In a medium saucepan over medium heat, melt the butter. Stir in the flour mixture by tablespoon to form a roux. Then whisk in the half and half, a little at a time, into the roux until mixed and completely smooth. (This part has given me problems both times. Mine has turned out very clumpy. The first time I put it in the crockpot anyway, hoping the lumps would go away, but they didn't. Ick. The second time, I had a little more success, but there were still several clumps, so I ended up putting a bowl in the sink and straining the liquid into the bowl so I had a smooth mixture. Maybe you'll have better luck, but just wanted to give my tips and tell you that all hope is not lost if it happens to you too!)
  • Stir the roux mixture into the soup in the crock-pot, and then let it cook on low for about 15 minutes.
That's it! The first time I made it, it was really thick, but I think that's because I accidentally used heavy whipping cream instead of half and half. The second time I made it, it was significantly runnier, probably a combo of using half and half, and me straining out many of the flour chunks from the roux. I didn't find it to be too runny. It was actually perfect! If you want it thicker, you could probably add some more flour, and if you want it thinner, you could add a little more broth or some water. All a matter of preference! As usual, the soup didn't last me and L very long because we both love it, but unfortunately, my crock-pot is just a tad too small to double the batch. Guess we'll just have to make it more often! Be prepared to have your tastebuds tantalized, folks! :)